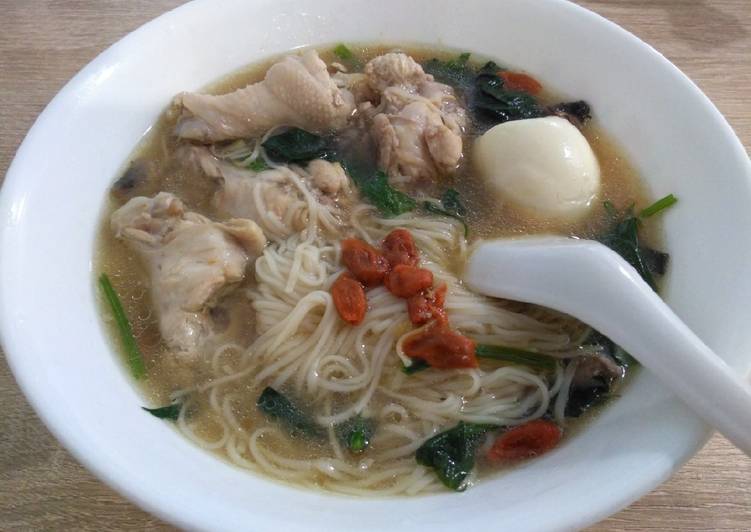
麻油鸡面线 Sesame Oil Chicken Flour Vermicelli ~ Happy Cooking - several times is being sought after by many community around us, one of them is you. they indeed have get used to to take advantage of internet on ponsel to looking for information to be used idea. Therefore Our give Information about 麻油鸡面线 Sesame Oil Chicken Flour Vermicelli is could our make it inspiration.
 my Buddy able create 麻油鸡面线 Sesame Oil Chicken Flour Vermicelli using tools 9 ingredient 5 step. this is it step by step for make it.
The composition for cooking 麻油鸡面线 Sesame Oil Chicken Flour Vermicelli
- You need to prepare 鸡小腿 Chicken drumlets (8-10).
- capable need to provide too 面线 Flour vermicelli.
- capable need to provide 老姜 Old ginger (4-6 slices).
- Also add 麻油 Sesame oil (1 tablespoon).
- Please prepare 枸杞 Goji berry.
- Also add 菠菜 Spinach.
- Buddy also needs 鸡蛋 Egg (1 each bowl).
- capable need to provide too 酱清 Light soy sauce (1 tablespoon).
- Also add 蚝油 Oyster sauce (1 tablespoon).
The Instructions how to cook 麻油鸡面线 Sesame Oil Chicken Flour Vermicelli
- 煮熟鸡蛋备用 Prepare hard-boiled eggs.
- 用麻油,蚝油,酱清腌小鸡腿5分钟 Marinate chicken drumlets with sesame oil, oyster sauce and light soy sauce for 5mins.
- 热油,加入姜片炒香。加入腌好的小鸡腿翻炒 Heat oil, add old ginger. Add marinated chicken drumlets.
- 加入两碗水,大火煮滚后转小火 Add 2 bowls of water, cook with high heat. Turn to low heat when it's boiling.
- 加入枸杞,面线,菠菜,鸡蛋煮2分钟 Add goji berry, flour vermicelli, spinach, eggs and cook for 2mins.
That's the discussion or tutorial about 麻油鸡面线 Sesame Oil Chicken Flour Vermicelli Thank you for your visit, if you feel this post on this site helpful, support our by sharing article this blog to social media accounts that you have like facebook, instagram, pinterrest, Instagram and so forth Or We can also mark off this website this with the title 麻油鸡面线 Sesame Oil Chicken Flour Vermicelli This connten grouped into categories and also this post it is sourced from https://www.cookpad.com ... Happy Cooking :)

